What is Linear Scanning
Linear scanning is generally recognised to be the best non-destructive testing (NDT) solution for the volumetric examination of many structures.
A high-resolution ultrasonic NDT solution for fast inspection of large surfaces.
Linear scanning, also known as electronic scanning, is a type of ultrasonic testing (UT) technique. Usually applied at zero degree, this UT technique is generally recognised to be the best non-destructive testing (NDT) solution for the volumetric examination of many structures. The approach is suitable for composite material inspection and general steel thickness measurement or corrosion mapping.
How does it work?
It is based on the use of a linear array (or probe or transducer), that has many individual piezoelectric elements in a single housing. Each group of elements pulses a single straight beam, at zero degree. This means that the beams are perpendicular to the inspected surface.
|
|
|
|
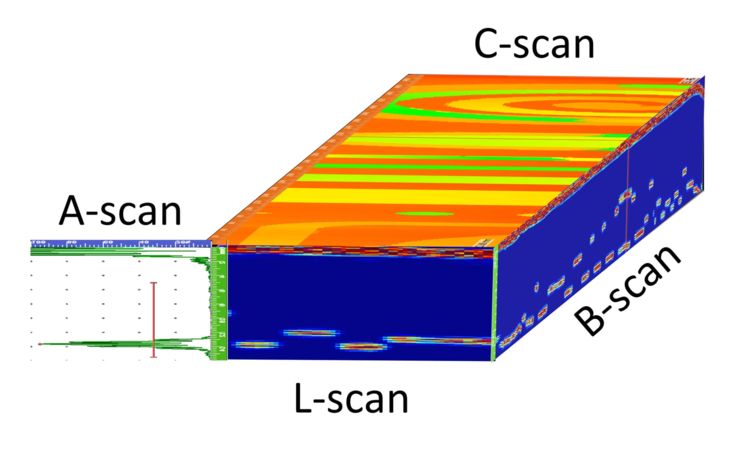
Once the transducer moves, it uses an encoder to record the high-resolution mapping of data using the A-scan. To perform mapping over a large surface, multiple strips can be recorded one after the other to cover all of the surface.
|
|
|
|
This type of scan is a waveform representing the amplitude of the ultrasound signal as a function of time or distance of propagation. Another view can be generated from this record, the C-scan, which is essentially a view generated from a 0-degree linear scan. A C-scan uses a data gate to extract information from A-scan data. It can be described as a two-dimensional graphical representation displaying the gate information obtained relating to signal features in a top plan view of the test structure.
The data is represented by colours to illustrate the volumetric examination.
|
|
|
|
Benefits of the linear scan
One of the main benefits of linear scanning are the high-resolution inspection results. Indeed, each element represents a probe in itself. Thus, compared to a single-element transducer, it is possible, in a single pass, to have a high-class quality image thanks to the many beams that constitute the linear array. The image below is a steel test piece created to demonstrate changes in thickness.
|
|
|
|
As a result, large surfaces can be inspected using straight beam linear scanning. The image below represents a complete C-scan mapping of a 7m long aircraft rear stabiliser performed using Sonatest equipment.
|
|
|
|
When compared to the more complex ultrasonic phased array technique, it is important to mention that the technician does not have to consider any beam steering concepts with the linear array method because all beams are identical and perpendicular to the surface. This greatly simplifies the application, the calibration process and eases the post-acquisition analysis for reporting.
In short, linear scanning is an appropriate solution for both composite inspection, material thickness measurement and corrosion mapping because it simplifies the task for the technician and offers high-resolution volumetric inspection results.


