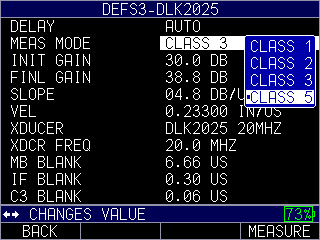
Wide thickness range using delay line probes
Aircraft manufacturers have very demanding specifications when it comes to non-destructively measuring the wall thickness of aircraft parts.
The challenge was to cover a range in steel or aluminum from .007-1.000” using one transducer setups. In the past, even with longer delay lines which extends the “window of opportunity” to detect the echoes, this range was not achievable as the echoes from the thinnest readings would ring too much.
Alphagage+ using a 10 or 20 Mhz. delay line probe with an extended delay line in Class 5. This technique uses our proprietary software to cover this full range. This feature can also be used with our newest auto calibration feature. The operator would change calibration type from manual to auto and enter the thin (.007”) and thick (1.000”). Upon enabling auto cal, the gage then takes over all keypresses and on-screen instructions walk the user what to do such as put probe on thin, then thick and the Alphagage+ unit figures out and displays the acoustic sound speed of the test piece.
