Ultrasonic Rail Solid Axle Inspection with the Sonatest Wave
This type of inspection needs to be done after manufacturing of the axles, as well as multiple times throughout their working life.
Rail axles predominately come in 2 different styles, hollow and solid, the dimensions of which can vary depending on the type of rail which the trains run on. For this application note we will be looking at the inspection of a VLU type rail axle used on underground trains in London.
There are 3 different axle types in this class, all with different areas for geometrical reflections, please see images below:
|
|
|
|
|
|
The axle shown in Fig1 is the axle type inspected for this trial. This axle only has wheel location points, the additional grooves in the remaining two types of axle are for gear boxes and drive wheels, these are more complicated inspections as there are many more geometric indications to be seen during the scanning.
Please see below an image of the training axle we used. This has the same 3 defects as shown in fig 1, 2 at the near/far end (depending on which side you are standing) then also 1 in the centre of the axle. The 2 near/far end are approx. 1.5mm deep saw cuts, the centre is an approx. 3mm saw cut. The two images to the right of the full axle are the visible defects (one defect is hidden below the wheelset).
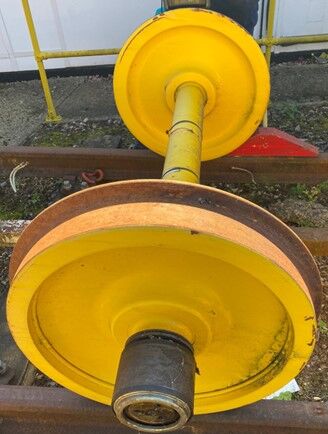
|
Training Axle |
Inspection Procedure:
Far end scan:
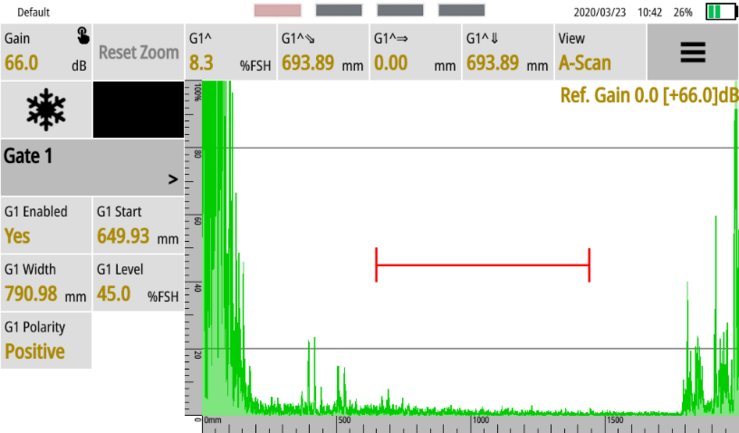
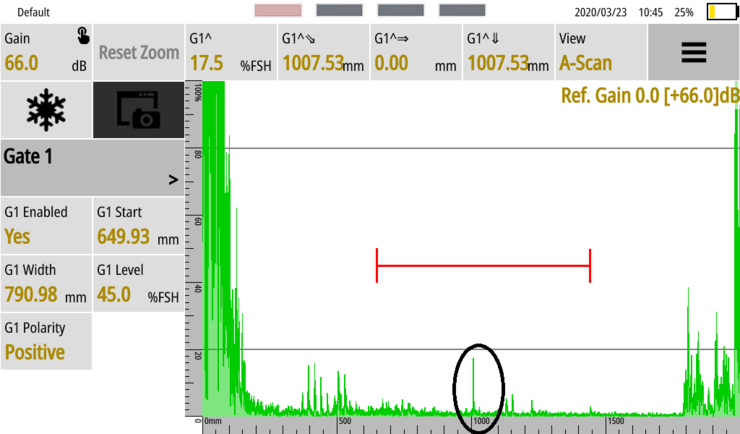
- The far end scan consists of using either a 0-degree or 5-degree transducer, this scan covers the body mid span of the axle.
- The A-Scan images below show an example of a good and bad sample, the defect in the bad sample is circled and shows at around 1000 mm, this is the centre of the axle.
|
|
|
|
|
|
Near end scan:
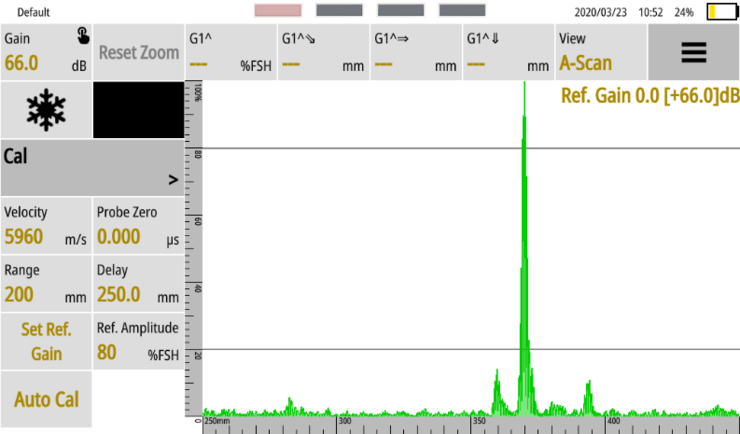
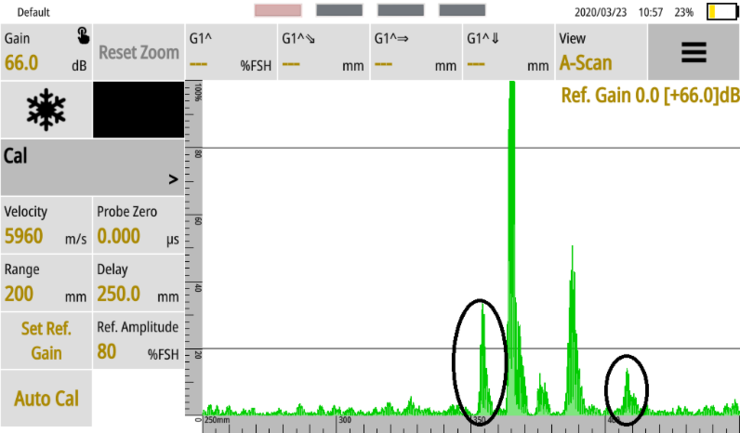
- The near end scan consists of using a 12.5-degree or 20-degree angle to inspect the inner wheelset and the wheelset transition area.
- The A-Scan images below show an example of a good and bad near end scan using a 20 degree angle. The first image is good, the second image shows 2 defects, one in the inner wheelset (first circle) the second in the wheelset transition (second circle).
|
|
|
|
|
|
Conclusion:
Axle inspection is a difficult but efficient method to detect cracking and inclusions throughout various axle style. The Sonatest Wave flaw detector gives superior signal to noise as well as a simple platform to make the process as smooth as possible.
For further information or support, please contact the Sonatest Applications Team: applications@sonatest.com.


