Phased Array Bolt Inspection
Traditional methods for checking bolts include removing and visually checking for any cracking, this not only takes a long time but can also cost a huge amount of money
Bolts are used in every industry and their integrity is vital in ensuring that assets remain safe during their lifetime. Traditional methods for checking bolts include removing and visually inspecting, however this not only takes a long time but is also expensive. Downtime for any reason is best avoided when possible.
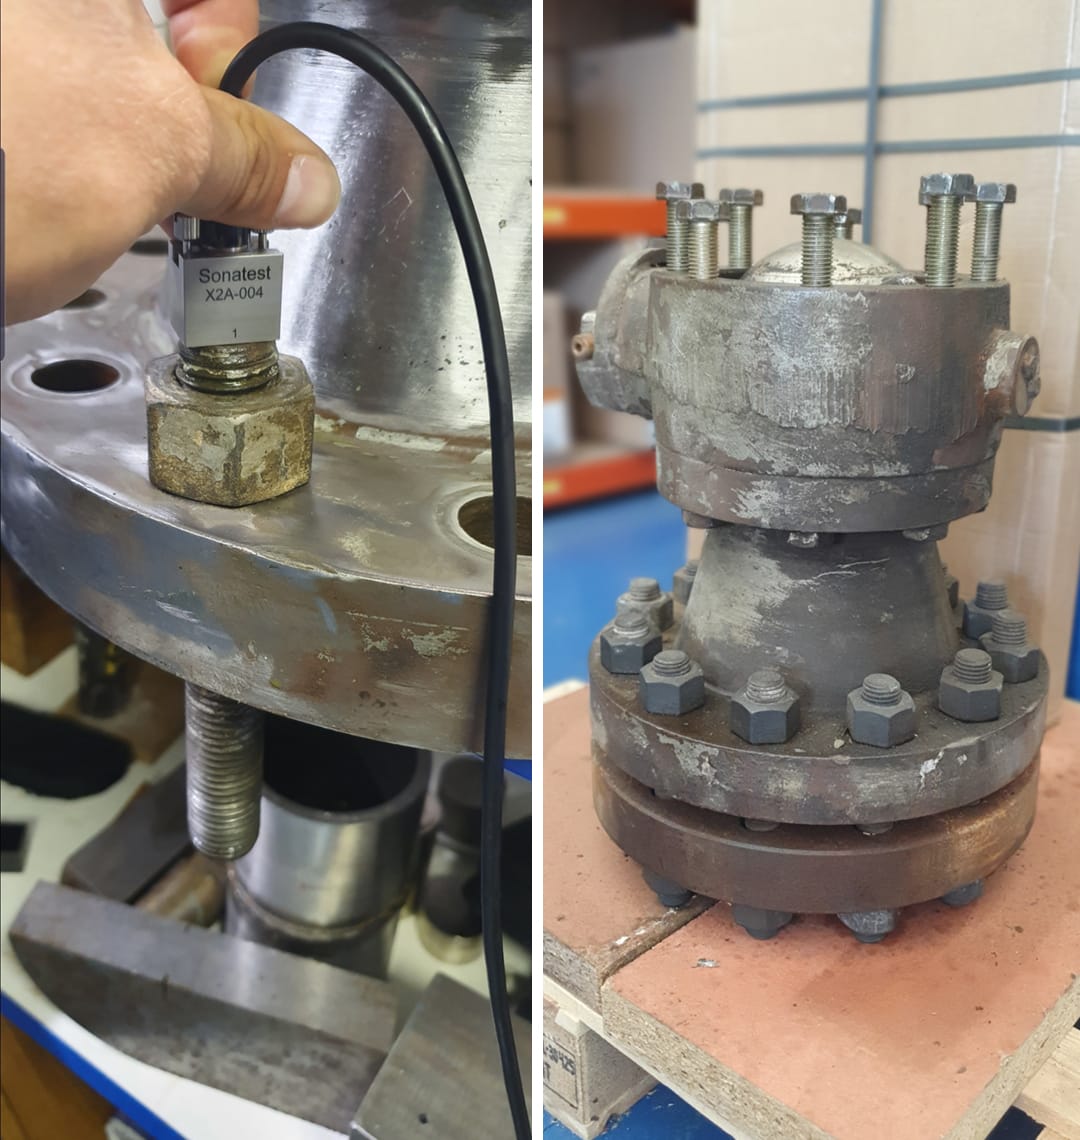
By utilising the Veo3, bolts can be quickly and accurately inspected without the need for them to be removed, allowing the plant/rig to continue to run at capacity, saving time and money.
|
|
|
|
|
|
|
|
Inspection Procedure:
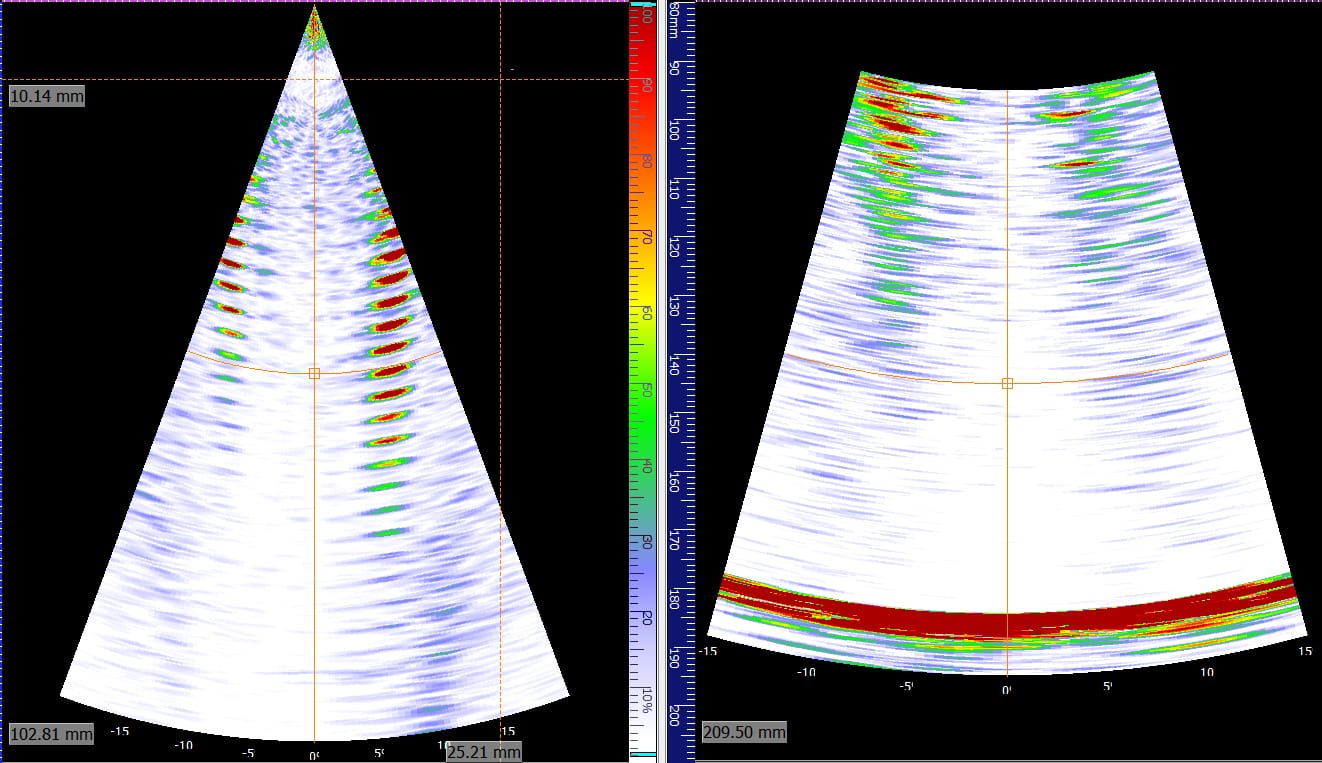
- The test data shown in this application note were taken on an 190mm long steel bolt with a 1-inch diameter. The bolt had 2 small SDH approximately 3mm deep, one at a 30mm or 150mm depth (depending on side of inspection) and one at approximately halfway down the bolt (95mm)
- For the inspection shown a 10MHz 16 element phased array transducer was used and this gave good resolution due to the higher frequency. Different probes and frequency can be used depending on the bolt size
- The inspection can also be encoded if necessary, for this a special scanning attachment like an ESBoltScanner will be needed
Inspection set up:
- Longitudinal sectorial scan
- 0-100mm, -25 – 25 degree spread
- 96-200mm -15 – 15 degree spread
- Focusing set to natural
Inspection Images:
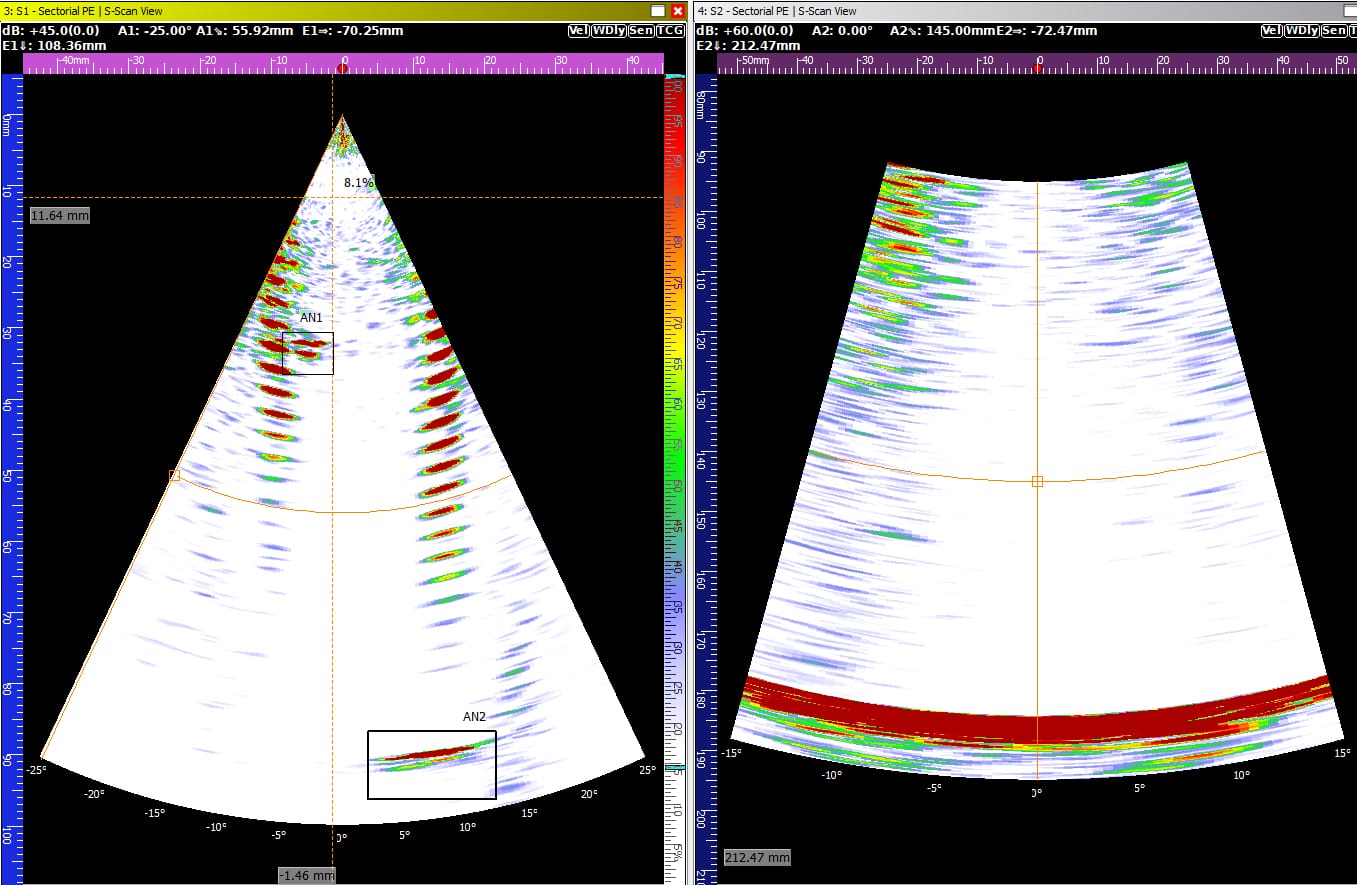
The image below shows the first defect at approximately 30mm depth and the second at approximately 90mm depth
|
|
|
|
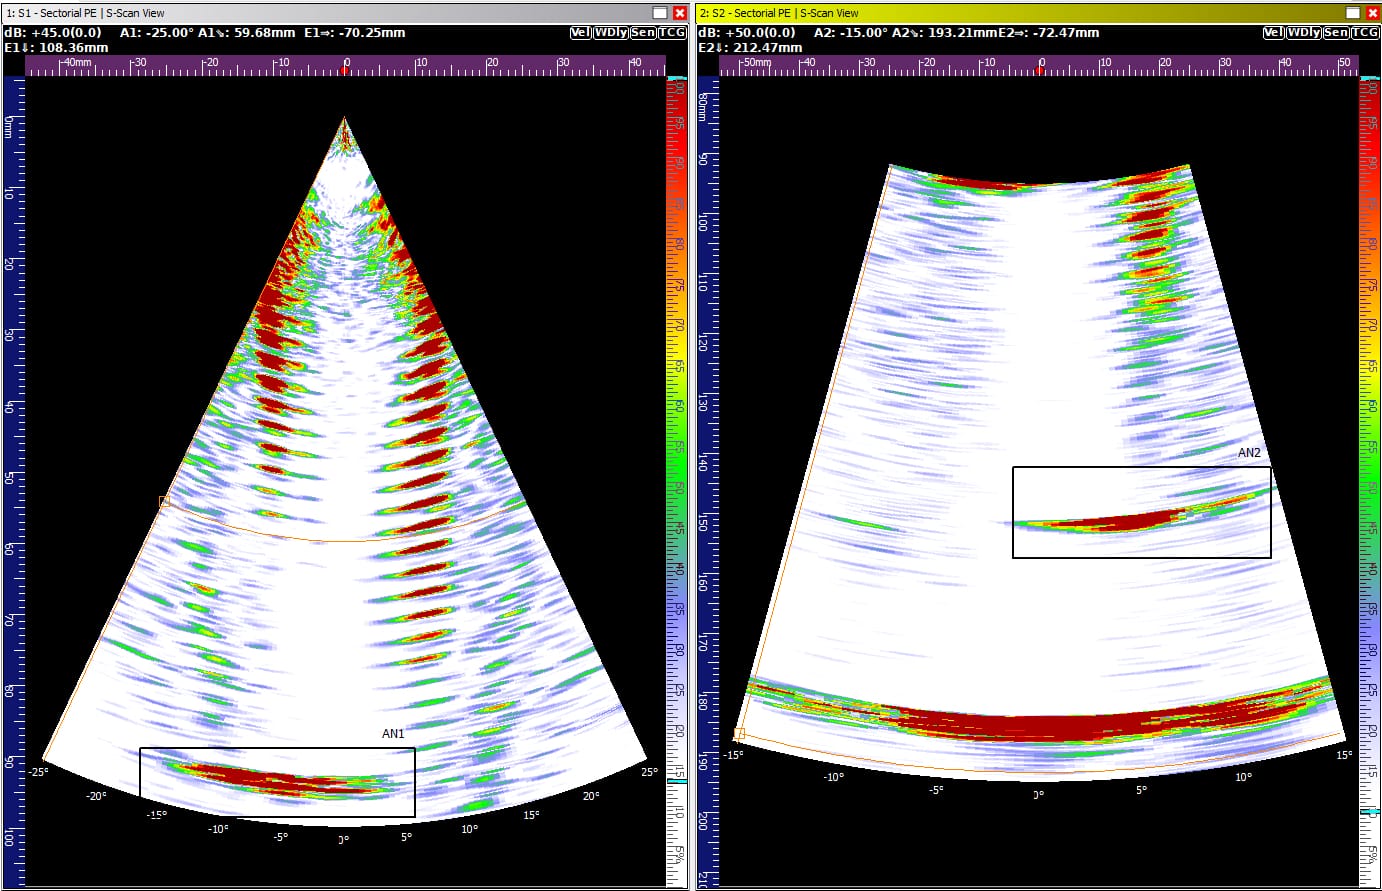
The image below shows the defects at approximately 90 mm depth and the second at approximately 150 mm depth.
|
|
|
|
Conclusion:
- Phased array bolt inspection is a quick and efficient way to perform in-service inspection of bolts
- Data can be recorded, giving the ability to monitor the growth of any defects
- TFM/FMC will give greater accuracy in defect sizing, if required
For further information or support, please contact the Sonatest Applications Team: applications@sonatest.com.


