Curved Surface Correction (CSC) for Long Seam Weld Inspection
Phased Array inspection of curved components can be challenging, especially for seam welds in small diameter or heavy wall pipes as inspection software tools and accessories are generally designed for flat surfaces.
Phased Array inspection of curved components can be challenging, especially for seam welds in small diameter or heavy wall pipes as inspection software tools and accessories are generally designed for flat surfaces.
Furthermore, interpretation of the sectorial scan can be difficult in such circumstances, due to the convex surface geometries and in many cases tools such as visualised weld overlays are not relevant. The result is often erroneous and imprecise flaw location and sizing.
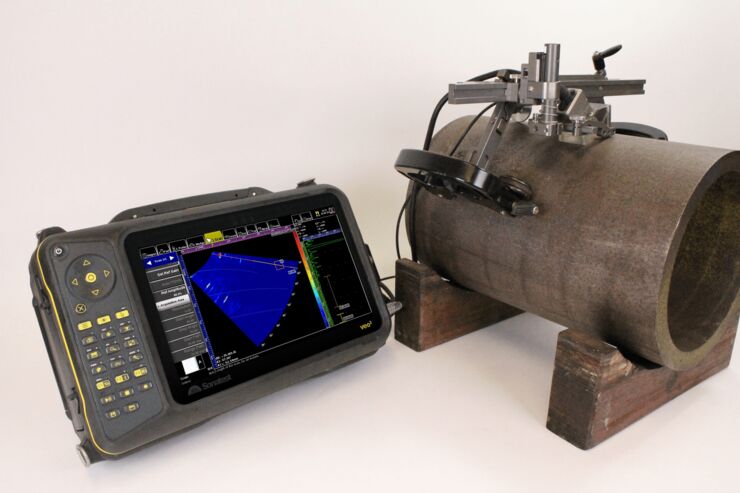
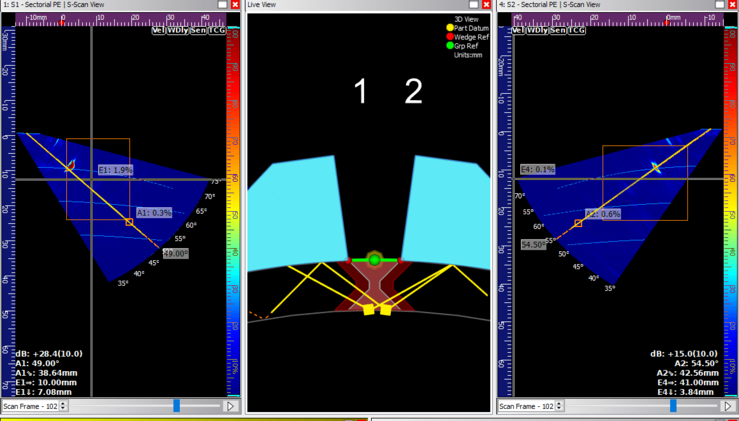
This application note highlights a new approach for inspecting seam welds. It uses the PA-CSC software package of Veo3. Once the region or regions of interest in the weld are defined by the inspector, accurate focusing in said region will be performed automatically. Fast S-Scans can then be recorded with the help of a proper scanner. Moreover, corrected A-Scan views are produced and supported by a live 3D scan plan the technician can perform accurate identification, interpretation, measurement and flaw sizing.

1. Challenge with Phased Array on curved surfaces
Displaying a PAUT sectorial scan with an overlay representing the weld is very common. In the case of flat surfaces, the skips of the sound path are dealt with by representing the weld overlay as a series of folded images. However, in the case of a curved surface, this method cannot be used as the reflected image formed by the convex surface is distorted and a curved surface cannot be folded.
In addition, the measured depth of the flaw would change as the probe travels along the curved surface.

Nowadays, the majority of long seam weld inspections target in service mechanical damage detection. More specifically for fatigue damage such as hook crack.
The image sharpness and resolution for such assessments are critical when it comes to flaw characterization. As a matter of fact, characterization mismatch may result in an increase of unnecessary repair such as already accepted fabrication flaw.
2. Constant resolution focusing solution
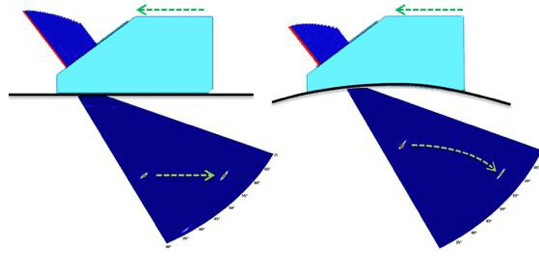
When using the traditional constant path focusing method on curved surfaces, the focusing points are affected by the convex lens effect of the part in the second skip, significantly decreasing the angular resolution, the beam’s energy density and the image sharpness leading to poor probability of detection.
The new PA-CSC constant resolution focusing let the user define a fixed beam resolution in the region of interest. It then uses this parameter for the focal law generator to generate UT beams at specific angles to ensure complete coverage of the weld and beam density, taking into account the effects of the curved surface. In addition, the actual flaw depth is now calculated from the corrected A scans and is not affected by the probe location. This feature is embedded in the instrument.
Here are the results from the two different types of focal patterns, constant path (left) and constant resolution (right);

As shown above, one can easily see that the method allows assuring focusing and imaging optimisation for the region of interest defined by the inspector, insuring proper and precise flaw location.
A direct link can be established between the A scan, sectorial scan and live 3D view thereby providing invaluable assistance to enable the technician to confidently locate and size flaws. Post-analysis is also possible using UT Studio software to extract and analyse data, create reports and share information.
|
|
|
|
By developing and providing constant resolution focusing capability, Sonatest provides a unique yet easy to use and accurate method of evaluating seam welds.
For further information or support, please contact the Sonatest Applications Team: applications@sonatest.com
